
Instructions to webclicker for faculty
Before enabling webclicker for your class and students, be sure to read the document, “Is Webclicker right for me?” and decide if this is an appropriate move for you and your students.
1) Start by creating your course in iclicker and entering that course.

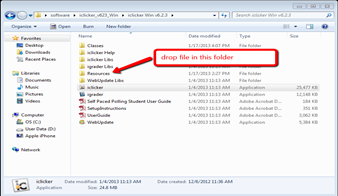
2) Extract and place the web voting config file in your RESOURCES folder.
(Download
webclicker_config_file.zip)
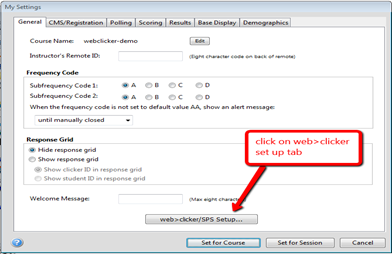
3) Go into your course and into ‘my settings’. On the first page toward the bottom, click on the ‘web>clicker/SPS Set up’ tab.
4) Fill out the registration form. Be sure to use the main campus zip code and click on the ‘look up’ tab to find your institution. Be sure to check the box that allows webclicker(s) to join your course and submit.

Your course is all set and students can now find your course. Be sure to have a solid internet connection prior to opening your iclicker software.