Introducing a new way to display content. Multiple classrooms have been converted to Bring Your Own Device (BYOD) Rooms. There are two ways to display content from your device: direct connect via HDMI or VGA Cables (already provided in rooms), and wirelessly via Wireless Sharelink. Instructions on how to operate the BYOD system can be found below. For UHM faculty and staff using a BYOD classroom that don’t have access to a laptop, please contact CIS for accommodations.
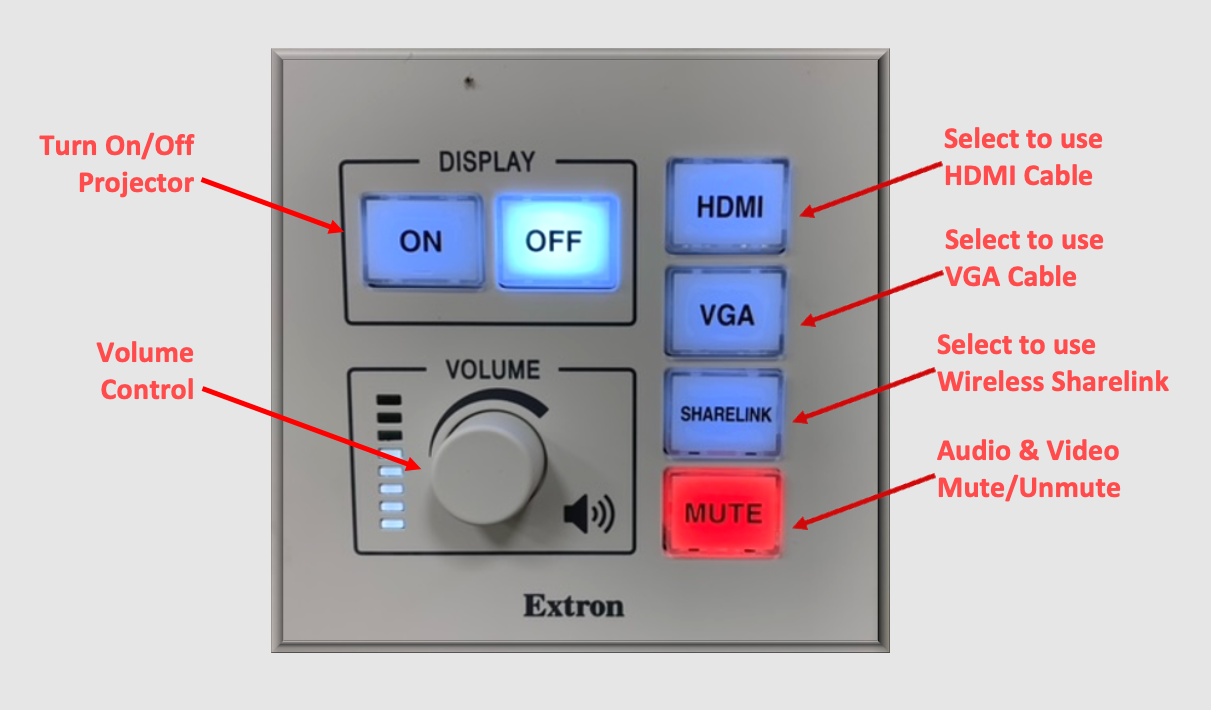
On the BYOD Control Panel, select “ON” to power on the projector
On the BYOD Control Panel, select “SHARELINK”
Follow the instructions that appear on the projection screen
Additional Controls:
“MUTE”: Select to stop audio and visual from appearing on the projection screen.
Volume Control Knob: Turn left to lower the volume, turn right to increase the volume.
Kuykendall & Sakamaki Building BYOD Rooms
BYOD Control Panel
(Sakamaki, Configuration 1)
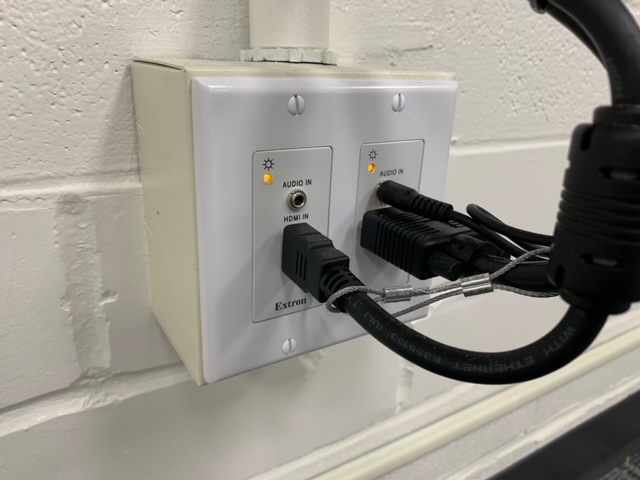
BYOD Wall Plate
(Kuykendall & Sakamaki)
CLICK HERE for Kuykendall & Sakamaki Building BYOD Room Instructions
BYOD Connection Option #1: HDMI Cable
On the BYOD Control Panel, select “PROJ ON” to power on the projector
On the BYOD Control Panel, select “WALL PLATE”
Plug in the HDMI cable attached to the Wall Plate to your laptop
BYOD Connection Option #2: Wireless
On the BYOD Control Panel, select “PROJ ON” to power on the projector
On the BYOD Control Panel, select “WIRELESS”
Follow the instructions that appear on the projection screen, or see below for recommended connection based on device type:
Extron Sharelink App (Best for Windows Computers) Note: if the app has been previously downloaded, skip to step 3
Enter the IP Address that appears near the bottom of the projection screen in your browser
Select “Install Pro Software for Windows” and follow download prompts
Open the ShareLink application and select “Input IP or hostname”. Type in the IP Address (bottom left of the projection screen), then the Passcode (“Code” on the bottom right of the projection screen)
Press the Play button to begin sharing content off your device
Screen Mirroring (Best for Mac Computers) Note the items noted in this section’s steps may be slightly different per computer
Open the “System Preferences” on the Mac
Select “Display”
In the “AirPlay Display” section, click the drop down and find the correct “Hostname” (found on the bottom left of the projection screen)
Type in the AirPlay Password (“Code” on the bottom right of the projection screen) to begin sharing
Additional Controls:
“BLANK ON/OFF”: Select to stop projector from displaying visuals.
“AUDIO MUTE”: Select to stop audio from playing in the room.
Volume Control Knob: Turn left to lower the volume, turn right to increase the volume.