

Some classrooms have ViewSonic touch screen monitors installed to use with the in-room computer. The ViewSonic monitors have two modes: an android mode, and HDMI mode where it can be used as a touch screen monitor. In the event the ViewSonic gets switched out of the HDMI mode, the monitor’s screen may appear different from the display on the regular computer/projection screen. Follow the steps below to change the ViewSonic’s input:
How to Switch Inputs on ViewSonic Monitor
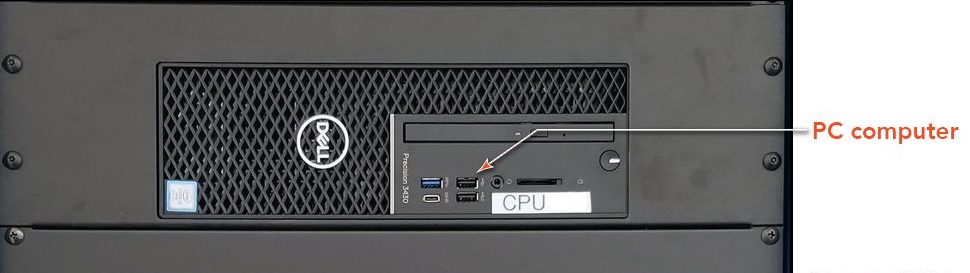
- Check to make sure the in-room computer is powered on. The computer is usually located within the podium.
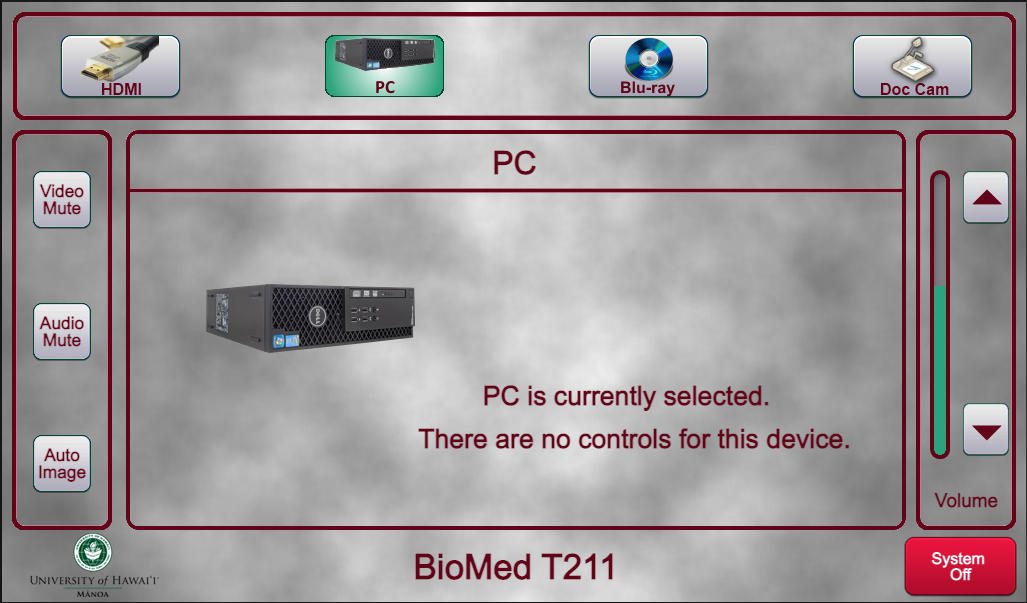
- Check to make sure the touch panel (usually located on top of the podium) is turned on, and PC is selected as your source (as shown below).
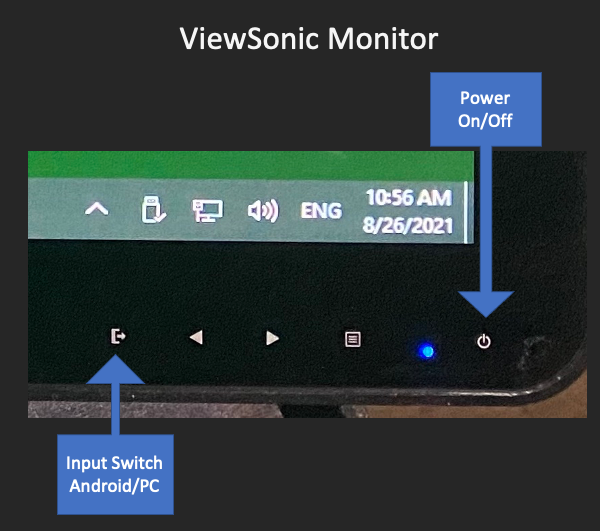
- Check to make sure the ViewSonic monitor is powered on. The Power On/Off button (as shown below) should be blue.
- Press and hold the Input Switch button (as shown above) for three seconds.
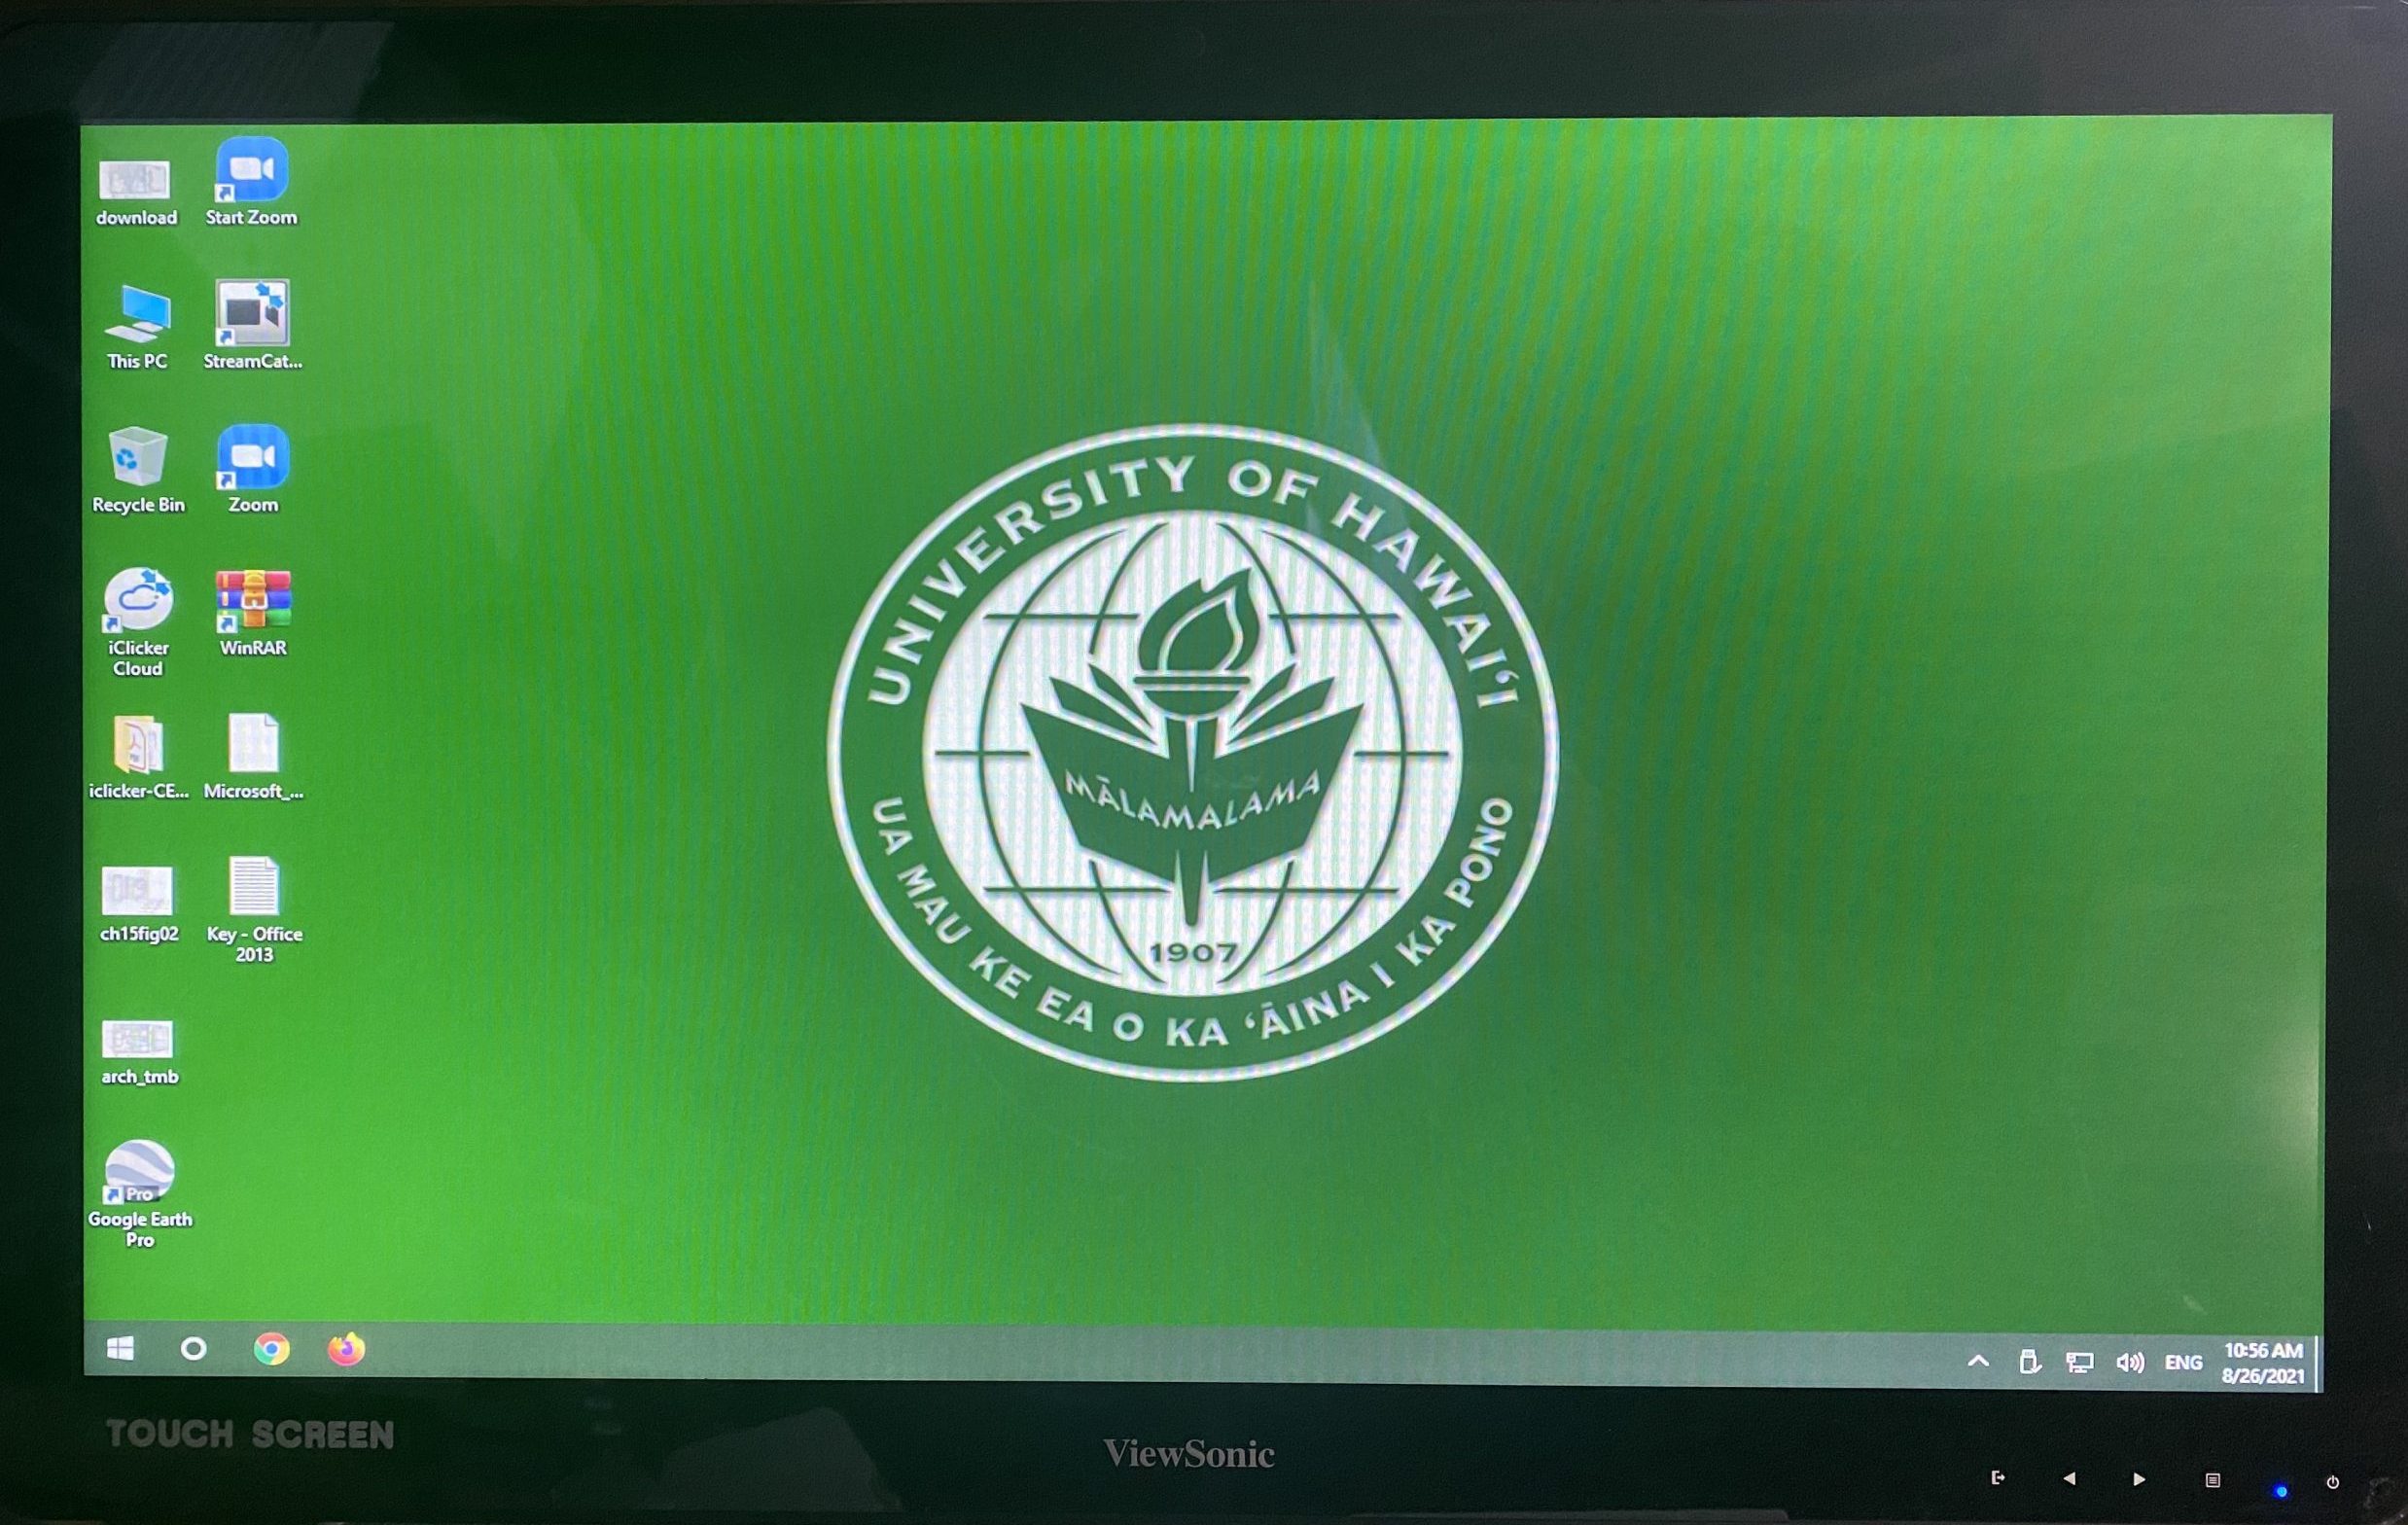
- The monitor should then display the in-room computer’s desktop image, similar to the photo above.
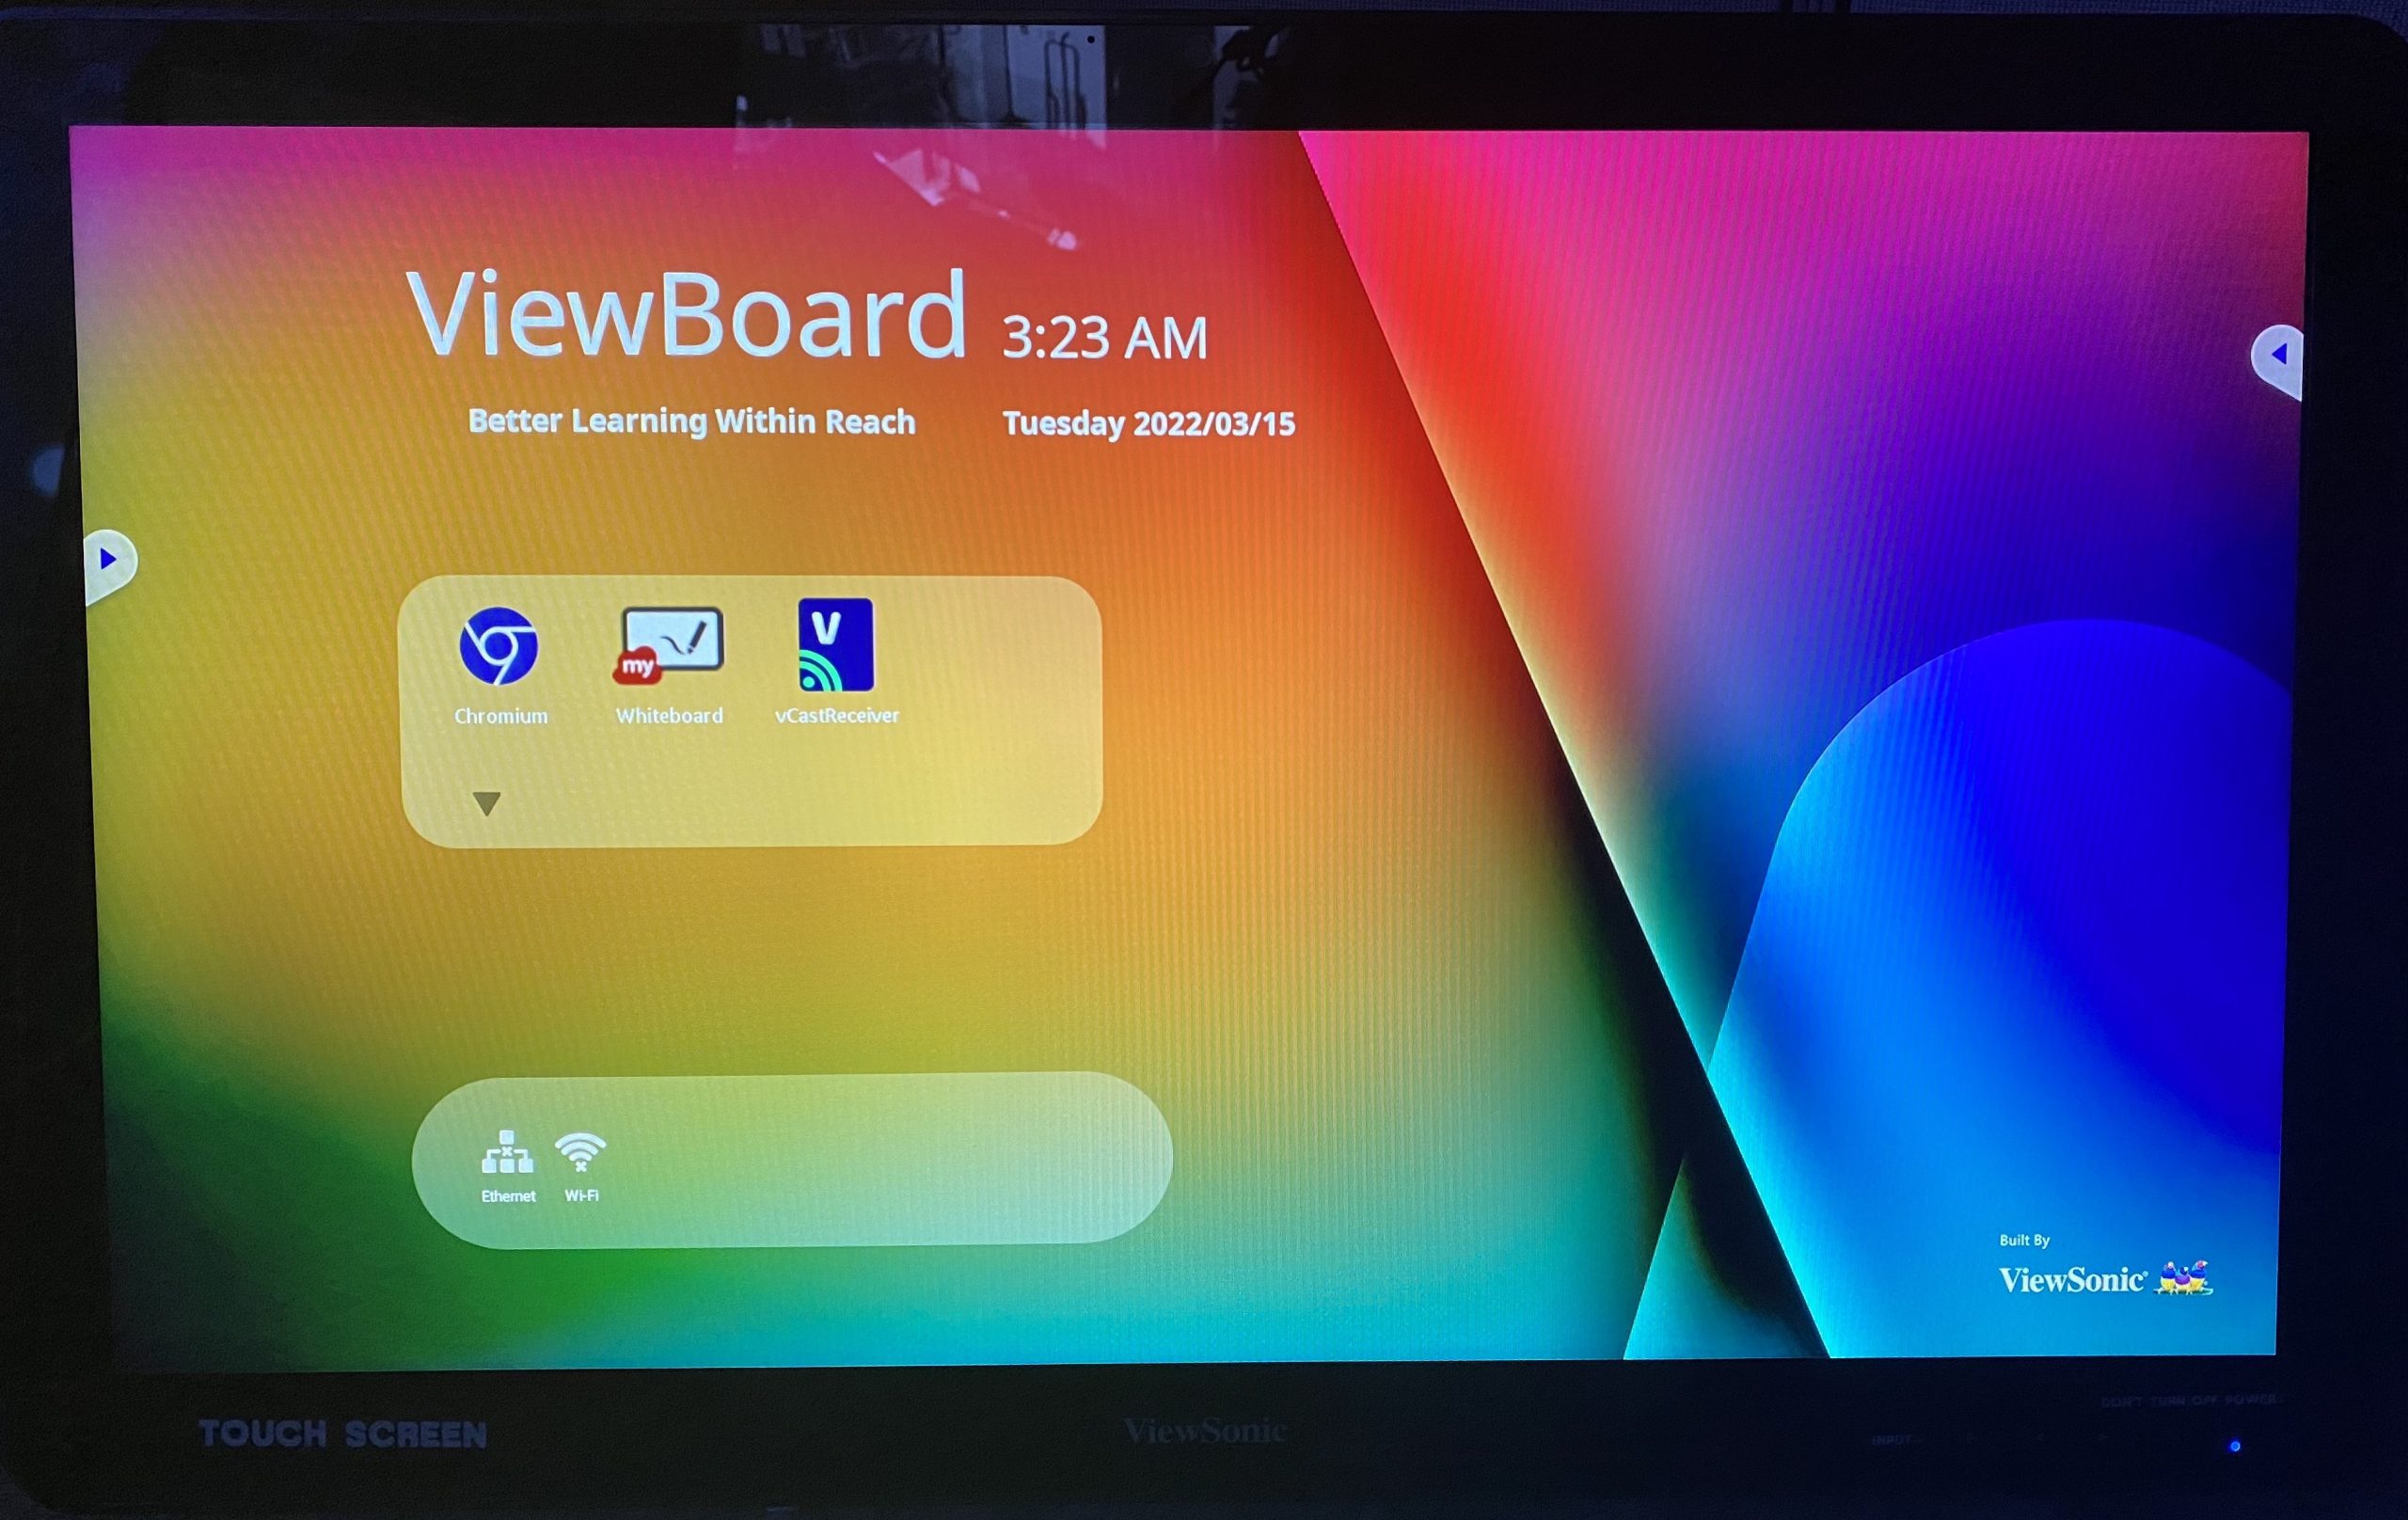
- The photo above shows an example of what the ViewSonic’s Android mode looks like. If your photo looks similar to this, repeat Step 3 to change the input again.
Note: If you see the UHM logo on your monitor, but the desktop icons appear different than what is on the projection screen, the computer’s display may be set to Extended. To switch your display settings so both the image on the projection screen and on the computer monitor matches, please see the article on Duplicate Display Settings.
Click here to return to the Troubleshooting References webpage.